Answer: An in-wall wiring kit is the best solution for hiding TV power and HDMI cables behind walls, creating a sleek, clutter-free viewing area. These kits are ideal for homeowners, renters, and home theater enthusiasts who want a professional look without running wires along the wall surface. The top options below offer varying intake capacities, ease of installation, and included accessories to fit different wall types and device needs.
The following table summarizes five selected in-wall wiring kits, highlighting who they’re best for and key strengths.
| Product | Best For | Key Strength |
|---|---|---|
| Mount-It! In-Wall TV Cable Concealer Kit | Mixed home theaters and living rooms | Deep recessed opening and plug-in power option |
| ECHOGEAR TV Cord Hider | Two-device setups with robust low-voltage support | Dual outlet in-wall module with comprehensive install kit |
| Riozoo TV Wire Hider Kit | Perforated walls and quick install | White finish blends with decor; perforated-wall design |
| COOVIE In-Wall Cable Management Kit | Simple, DIY projects with minimal tools | Pre-wired design; paintable white finish |
| Celendor In-Wall Cable Concealer Kit | Large cable loads and flexible routing | All-in-one kit with brush wall plate and 9ft cord |
Mount-It! In-Wall TV Cable Concealer Kit
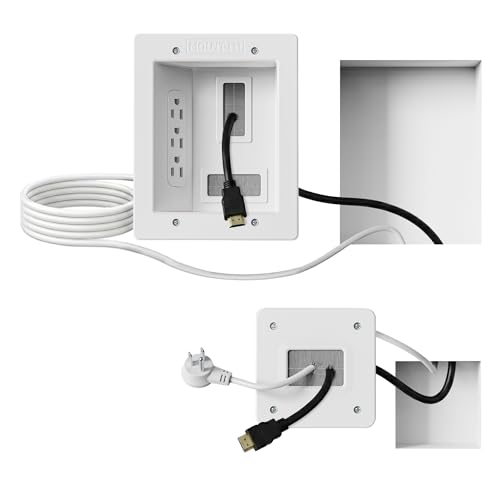
Best for: Home theater owners seeking a polished wall with a built-in power kit. This option provides a spacious recessed opening for multiple HDMI, Ethernet, and A/V cables and includes a drywall saw for DIY installation.
Why chosen: It emphasizes organized cable concealment and a neat, modern look, with a plug-in power approach that avoids hard-wiring. The included cutting template and step-by-step instructions simplify setup in under 30 minutes. Limitations: It is a plug-in system, so it does not replace electrical wiring; you will still rely on a standard wall outlet.
ECHOGEAR TV Cord Hider for Wall Mounted TV
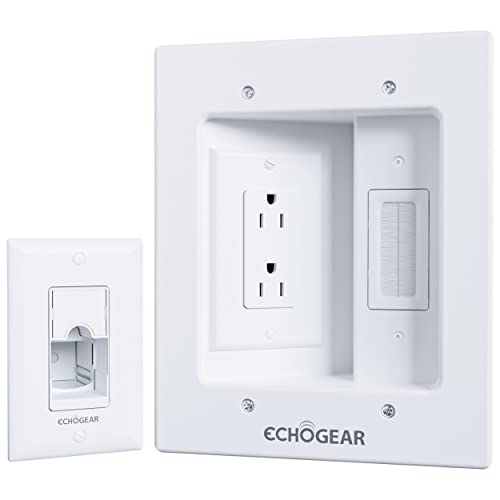
Best for: Dual-device wall installations with robust low-voltage support. The kit powers two devices and hides three low-voltage cables behind the wall.
Why chosen: The included wall template, drywall saw, and the compact module lead to a clean install without external hubs. The dual top outlet helps accommodate awkwardly shaped plugs. Caution: Ensure your wall cavity depth matches the module requirements for a flush finish.
Riozoo TV Wire Hider Kit for Wall Mount TV
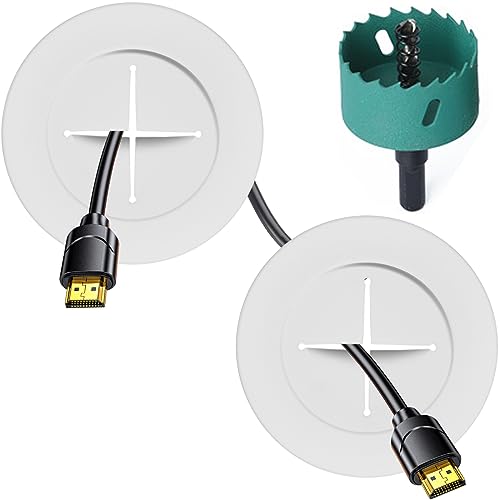
Best for: Perforated or plaster walls where quick, visible-light concealment is desired. The kit is designed to blend with decor and streamline TV setups.
Why chosen: It focuses on a tidy, integrated look with 2 pass-throughs and a hole saw drill attachment included for easier installation. Limitation: Best suited for perforated walls with specific thickness; verify wall type before purchase.
COOVIE In-Wall Cable Management Kit

Best for: DIYers who want a quick setup with a slim white finish that can be painted to match decor. Includes a hole saw attachment for precise grommet placement.
Why chosen: This kit is designed for fast installation with a pre-wired approach, reducing electrician needs. It clearly notes the minimum cavity depth requirement and offers a flush, wall-friendly result. Caution: A minimum background cavity space is required (2.5 inches behind drywall is often stated as a baseline) to install effectively.
Celendor In-Wall Cable Concealer Kit

Best for: Users needing an all-in-one solution that handles power and multiple data cables with a brush wall plate for a refined finish.
Why chosen: The kit includes a brush wall plate and a 9-foot cord with two-gang pass-throughs, suitable for TV cables, HDMI, and other AV connections. Limitation: Verify mounting wall depth and ensure your wall cavity can accommodate the included components, especially behind thicker drywall.
Buying Guide: Key Purchase Considerations
What should you assess before buying an in-wall wiring kit?
- Wall type and cavity depth: Some walls require deeper or wider openings. Check minimum space behind drywall and whether your wall is plaster, drywall, or hollow.
- Device count and cable types: If you plan to hide HDMI, Ethernet, power, and speaker cables, ensure the kit supports multiple pass-throughs and a dual outlet if needed.
- Power safety: Most kits offer a plug-in power option, not a hard-wired solution. Confirm compliance with local electrical codes and the kit’s recommended use.
- Ease of installation: Look for included templates, saws, and pre-wired options that reduce the complexity of DIY installation.
- Aesthetic considerations: Brush plates, recessed outlets, and paint-ready finishes help the concealment blend with your room decor.
- Wall compatibility: Confirm the wall material and thickness; some kits target perforated walls, plaster, or wooden planks.
- Future upgrades: If you anticipate upgrading devices, choose a kit with flexible cabling paths and extra pass-throughs.
Frequently Asked Questions
- Do in-wall cable kits require an electrician? Answer: Most are designed for DIY installation and do not require electrical wiring changes, but always follow local codes and use the included templates and safety guidelines.
- Are these kits safe behind walls? Answer: Yes, when installed as directed, they conceal wires effectively while providing power and data paths behind the wall.
- Can I paint the outlet cover to match my wall? Answer: Many kits use paint-ready plates; confirm the finish is compatible with your wall paint.
- Will these kits work with beam or stud walls? Answer: They work best with standard drywall or plaster; verify cavity depth and clearance behind studs before cutting.
- Do I need to remove outlets for installation? Answer: Some kits are plug-in and do not require electrical wiring, while others may require minor wall opening for access to outlets.
- What is the typical installation time? Answer: Many kits can be installed in under 30 minutes with basic tools and the included hardware.